Guide to R Installation for Data Analysis
In this comprehensive guide, we walk you through the step-by-step process of installing R, Rtools, RStudio a powerful programming language for statistical computing and graphics.
R Installation: Learn how to download and set up R on your system.
Setting Up RStudio: Discover how to install RStudio, an integrated development environment for R.
Installing Packages: Find out how to install essential packages for data analysis and visualization.
Guide Table for R, Rtools, RStudio

1) R Installation
R Installation Process:
Download R: Before you install RStudio, you need to have R installed on your system. You can download R from the Comprehensive R Archive Network (CRAN) website: [CRAN R Project] (https://cran.r-project.org/).
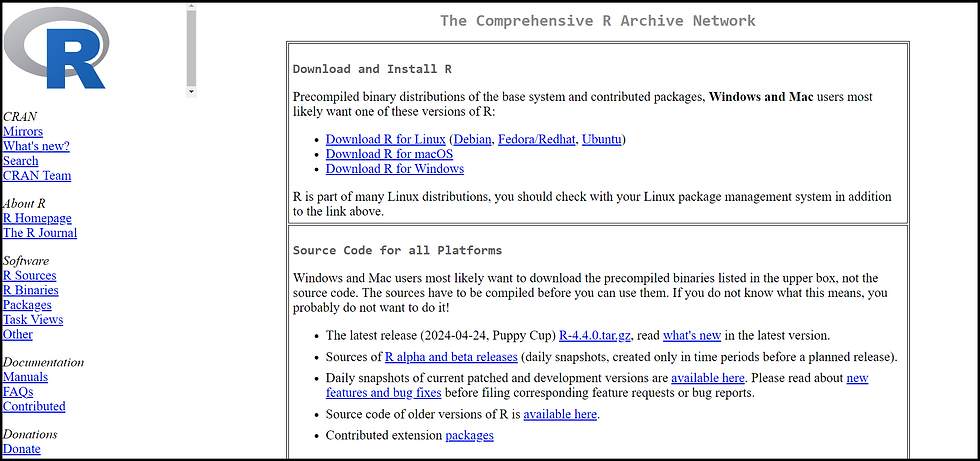
Install R: Follow the installation instructions provided for your operating system (Windows, macOS, or Linux).

Once the installer is downloaded, navigate to the downloaded file and double-click on it to run it. You might see a security warning; click "Run" to proceed.
- Follow the installation wizard instructions:
- Choose your language.
- Accept the license agreement.

Choose the destination folder for R installation (usually, the default location is fine).

Select components to install (typically, you can leave all components selected).
- Click "Next" through any additional prompts.

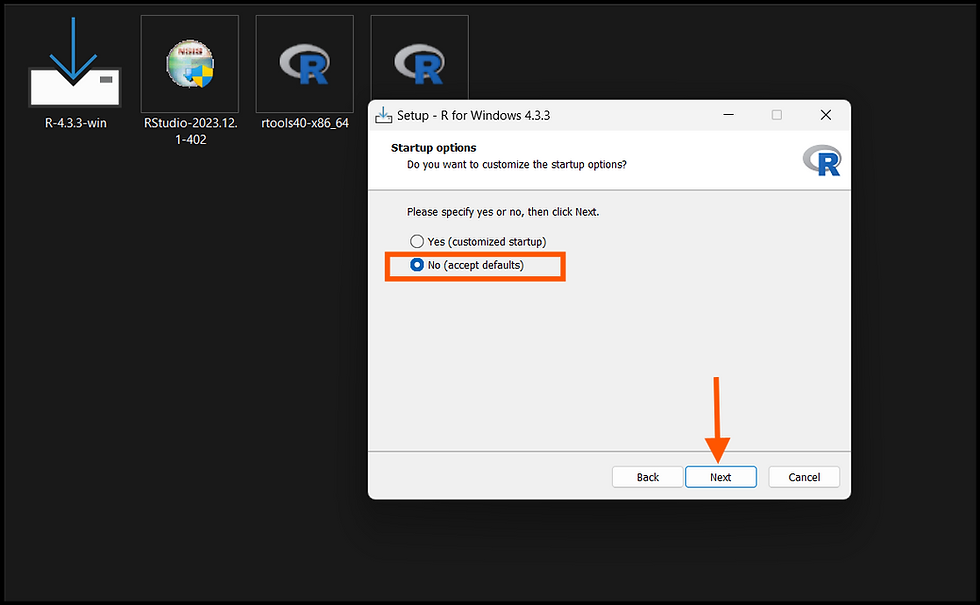

Finally, click "Install" to begin the installation process.

Click "Finish".

Check You installation for given location in below image.
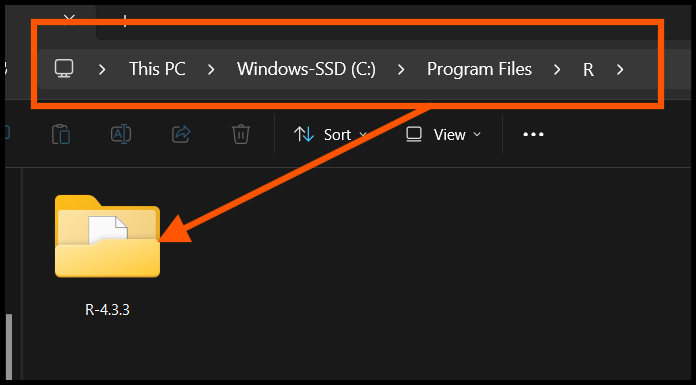
Setting Environment Variables for R:
Press the `Windows` key and type "Environment Variables." Select "Edit the system environment variables" from the search results.

In the System Properties window, click on the "Environment Variables" button at the bottom.
In the Environment Variables window, under the "System variables" section, find the "Path" variable and select it. Click on the "Edit" button.
R Installation Path: C:\Program Files\R\R-x.x.x (replace "x.x.x" with the version number).
Open File Explorer and navigate to the R installation directory.
The default path is typically:
2) R tools Installation
Installation:
Download Rtools: Go to the Rtools website: [https://cran.r-project.org/bin/windows/Rtools/](https://cran.r-project.org/bin/windows/Rtools/).
Run the Installer:
- Once the Rtools installer file is downloaded, navigate to the location where it's saved.
- Double-click on the installer file (e.g., "Rtoolsxx.exe") to run it. You may see a security warning; click "Run" to proceed.

Installation Wizard: Choose the destination folder for Rtools installation. The default location is usually fine, but you can change it if needed. Click "Next" to proceed.

The final screen and click "Install" to begin the installation process.

The installer will now install Rtools on your system. This may take a few moments.
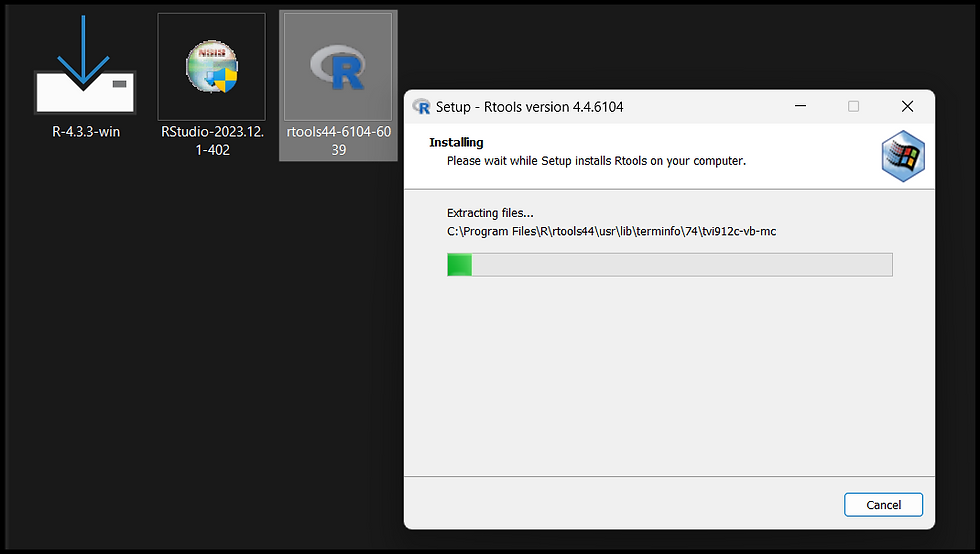
Once the installation is complete, you'll see a confirmation message. Click "Finish" to exit the installer.

Add Rtools to System Path (Important): After installing Rtools, it's essential to add its location to the system PATH environment variable. This step allows other programs to find Rtools executables.

Setting Environment Variables for R tools:
Press the `Windows` key and type "Environment Variables." Select "Edit the system environment variables" from the search results.

In the System Properties window, click on the "Environment Variables" button at the bottom.
In the Environment Variables window, under the "System variables" section, find the "Path" variable and select it. Click on the "Edit" button.
In the Edit Environment Variable window, click "New" and add the path to the "bin" folder of your Rtools installation (e.g., `C:\Rtools\bin`). Click "OK" to save the changes.
Close all windows by clicking "OK" to apply the changes.
Verify the Installation:
That's it! You've successfully installed Rtools on your Windows system and configured it to work with other programs. Rtools provides essential tools for building and compiling R packages from source code.
3) RStudio Installation
Installation Process:
After installing R, go to the RStudio website: [RStudio Downloads](https://rstudio.com/products/rstudio/download/). or you can Sign up for an account at the Rstudio Cloud sign-up page.

Select the Edition: RStudio offers two editions: RStudio Desktop and RStudio Server. Choose the one that fits your needs. For beginners, RStudio Desktop is recommended.
Download RStudio: Click on the appropriate download link for your operating system and follow the instructions to download the installer.

Install RStudio: Once downloaded, run the installer and follow the installation instructions.
Setting up RStudio for the First Time:
Run the Installer: Once the installer file (typically named something like "RStudio-x.x.x.exe") is downloaded, navigate to the location where it's saved.

Double-click on the installer file to run it. You may see a security warning; click "Run" to proceed.
Launch RStudio: After installation, launch RStudio from your applications menu (Windows/macOS) or terminal (Linux).
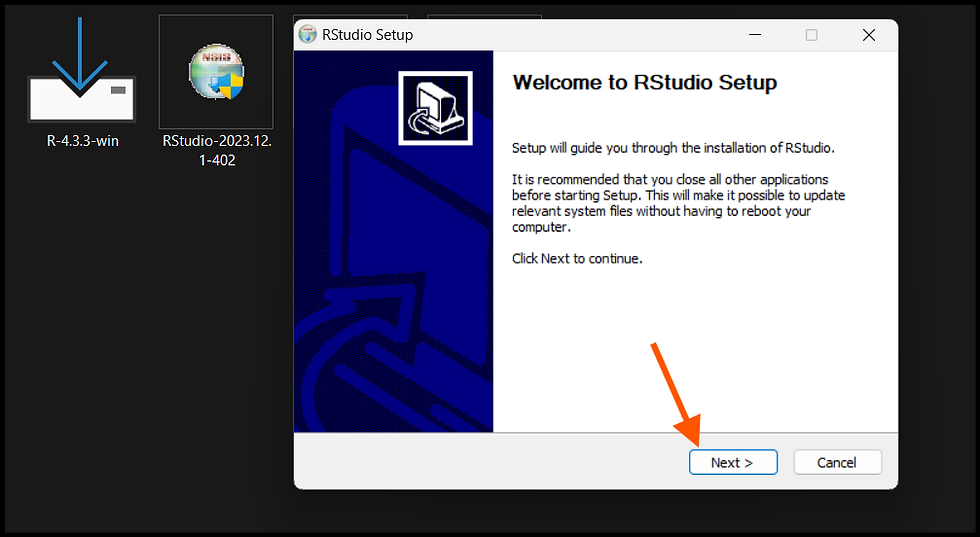
Choose the destination folder for RStudio installation. The default location is usually fine, but you can change
I would recommend to place all R installation inside one folder in Program files.

Select additional tasks, such as creating shortcuts, associating RStudio with R files, and creating a desktop shortcut. Make your selections and click "Next."

Review your selections on the final screen and click "Install" to begin the installation process.

Complete the Installation:
- The installer will now install RStudio on your system. This may take a few moments.
- Once the installation is complete, you'll see a confirmation message. Click "Finish" to exit the installer.

Check you file destination.

Setting Environment Variables:
Press the `Windows` key and type "Environment Variables." Select "Edit the system environment variables" from the search results.

In the System Properties window, click on the "Environment Variables" button at the bottom.
In the Environment Variables window, under the "System variables" section, find the "Path" variable and select it. Click on the "Edit" button.
RStudio Installation Path:
Similarly, locate the RStudio installation directory.
By default, it might be located at: `C:\Program Files\RStudio`.
Copy the path of the RStudio installation directory & add to environment path.
After adding all the necessary paths, click "OK" on each window to save the changes and close the windows.
Launch RStudio:
- After installation, you can launch RStudio by:
- Double-clicking on the RStudio icon on your desktop (if you chose to create a desktop shortcut during installation), or
- Searching for "RStudio" in the Start menu and clicking on the RStudio application.

Configure RStudio (Optional):
- Upon launching RStudio, you can customize settings according to your preferences. For example, you can adjust the appearance, set default working directories, configure code editing options, and more. Go to "Tools" > "Global Options" to access these settings.

Verify the Installation:
- Once RStudio is open, you can verify that it's working correctly by typing simple commands in the Console pane. For example, you can type `1 + 1` and press Enter. If RStudio is installed properly, it should return the result `2`.


![GAN [Generative Adversarial Network]](https://static.wixstatic.com/media/1eb057_8b114b6faef740079ee40edc659b1231~mv2.png/v1/fill/w_84,h_150,fp_0.50_0.50,q_95,enc_auto/1eb057_8b114b6faef740079ee40edc659b1231~mv2.webp)


コメント